In my previous post, I implemented a “simple” effect and a custom UITableView to enable drag’n’drop sorting of a ListView element in Xamarin.Forms. This was relatively straight forward considering the fact that iOS intrinsically supports drag and drop of items in a table view.
In this post, we will be implementing the same drag’n’drop effect/functionality for android using a similar approach with a custom list adapter.
Let us first implement the effect itself and then we can move on to implement our list adapter.
[assembly: ExportEffect(typeof(ListViewSortableEffect), "ListViewSortableEffect")]
namespace MyContacts.Droid.Effects
{
    public class ListViewSortableEffect : PlatformEffect
    {
        private DragListAdapter _dragListAdapter = null;

        protected override void OnAttached()
        {
            var element = Element as ListView;

            if(Control is AWidget.ListView listView)
            {
                _dragListAdapter = new DragListAdapter(listView, element);
                listView.Adapter = _dragListAdapter;
                listView.SetOnDragListener(_dragListAdapter);
                listView.OnItemLongClickListener = _dragListAdapter;
            }
        }

        protected override void OnDetached()
        {
            if (Control is AWidget.ListView listView)
            {
                listView.Adapter = _dragListAdapter.WrappedAdapter;

                // TODO: Remove the attached listeners
            }
        }

        protected override void OnElementPropertyChanged(System.ComponentModel.PropertyChangedEventArgs args)
        {
            if (args.PropertyName == Sorting.IsSortableProperty.PropertyName)
            {
                _dragListAdapter.DragDropEnabled = Sorting.GetIsSortable(Element);
            }
        }
    }
}
Here when the effect is attached to the ListView (i.e. AWidget is an alias for Android.Widget namespace), we are creating our custom list adapter and registering two event handlers:
- OnItemLongClickListener: We will be using the long click event as the start of the drag and drop. In iOS we were using the native handle that appears on the right-most side of the view element. This can be changed to use any other way that can facilitate a drag and drop. We we will need to implement the AWidget.AdapterView.IOnItemLongClickListener interface for this handler
- OnDragListener: We will be using different states of this event (e.g. enter, exit, drop…etc.) to control the items indexes and possibly animate the drag and drop. We will need to implement the AViews.View.IOnDragListener interface for this handler
Before we start implementing our list adapter, I would like to re-visit the custom UITableViewSource implementation we did for the iOS effect. In this implementation each virtual method was implemented as a pass through method, so that the table view source was acting almost like a proxy class. In order to achieve this on Xamarin.Android, we are already blessed with a specific interface: AWidget.IWrapperListAdapter (can read more about the android implementation here).
So in total, we will be implementing 3 interfaces, and we will be using the BaseAdapter class as a base for our customer adapter.
public class DragListAdapter :
    AWidget.BaseAdapter,
    AWidget.IWrapperListAdapter,
    AViews.View.IOnDragListener,
    AWidget.AdapterView.IOnItemLongClickListener
{
    private AWidget.IListAdapter _listAdapter;

    private AWidget.ListView _listView;

    private ListView _element;

    public DragListAdapter(AWidget.ListView listView, ListView element)
    {
        _listView = listView;
        // NOTE: careful, the listAdapter might not always be an IWrapperListAdapter
        _listAdapter = ((AWidget.IWrapperListAdapter)_listView.Adapter).WrappedAdapter;
        _element = element;
    }

    public bool DragDropEnabled { get; set; } = true;

    //... removed for brevity
}
Now, let us implement the methods from the IWrapperListAdapter and its parent interface IListAdapter
#region IWrapperListAdapter Members

public AWidget.IListAdapter WrappedAdapter => _listAdapter;

public override int Count => WrappedAdapter.Count;

public override bool HasStableIds => WrappedAdapter.HasStableIds;

public override bool IsEmpty => WrappedAdapter.IsEmpty;

public override int ViewTypeCount => WrappedAdapter.ViewTypeCount;

public override bool AreAllItemsEnabled() => WrappedAdapter.AreAllItemsEnabled();

public override Java.Lang.Object GetItem(int position)
{
    return WrappedAdapter.GetItem(position);
}

public override long GetItemId(int position)
{
    return WrappedAdapter.GetItemId(position);
}

public override int GetItemViewType(int position)
{
    return WrappedAdapter.GetItemViewType(position);
}

public override AViews.View GetView(int position, AViews.View convertView, ViewGroup parent)
{
    var view = WrappedAdapter.GetView(position, convertView, parent);
    view.SetOnDragListener(this);
    return view;
}

public override bool IsEnabled(int position)
{
    return WrappedAdapter.IsEnabled(position);
}

public override void RegisterDataSetObserver(DataSetObserver observer)
{
    base.RegisterDataSetObserver(observer);
    WrappedAdapter.RegisterDataSetObserver(observer);
}

public override void UnregisterDataSetObserver(DataSetObserver observer)
{
    base.UnregisterDataSetObserver(observer);
    WrappedAdapter.UnregisterDataSetObserver(observer);
}

#endregion
In this implementation, the methods that we have truly overriden are:
- GetView: We are using this method to attach the same drag listener on each list view cell that is pushed to the view during layout so we can retrieve events not only from the listview itself but its children.
- RegisterDataSetObserver: We are registering a data set observer that keeps the data source and and the ui elements in check to both the inner adapter and the custom adapter so we don’t need to call NotifyDataChanged manually. Same goes for the UnregisterDataSetObserver
method.
Now that we overriden the BaseAdapter to implement IListAdapter and implemented the IWrapperAdapter, we can move on to the event handler.
When starting the drag (i.e. when an item in the list was long clicked – tap and hold – by the user), we want to keep a reference to the view and the index of the starting position of the drag. In order to do this, we will create a simple class that will store these data points as the state object during the drag:
public class DragItem : Java.Lang.Object
{
    /// <summary>
    /// Initializes a new instance of the  class.
    /// </summary>
    ///
    /// The initial index for the data item.
    ///
    ///
    /// The view element that is being dragged.
    ///
    ///
    /// The data item that is bound to the view.
    ///
    public DragItem(int index, AViews.View view, object dataItem)
    {
        OriginalIndex = Index = index;
        View = view;
        Item = dataItem;
    }

    /// <summary>
    /// Gets or sets the current index for the data item.
    /// </summary>
    public int Index { get; set; }

    /// <summary>
    /// Gets the original index for the data item
    /// </summary>
    public int OriginalIndex { get; }

    /// <summary>
    /// Gets the data item that is being dragged
    /// </summary>
    public object Item { get; }

    /// <summary>
    /// Gets the view that is being dragged
    /// </summary>
    public AViews.View View { get; }
}
As the item being dragged, we will be updating the Index property and we will access the original dragged view using the View property.
And the long click handler, using the state object we created, would look something like:
public bool OnItemLongClick(AWidget.AdapterView parent, AViews.View view, int position, long id)
{
    var selectedItem = ((IList)_element.ItemsSource)[(int)id];

    // Creating drag state
    DragItem dragItem = new DragItem(NormalizeListPosition(position), view, selectedItem);

    // Creating a blank clip data object (we won't depend on this)
    var data = ClipData.NewPlainText(string.Empty, string.Empty);

    // Creating the default drag shadow for the item (the translucent version of the view)
    // NOTE: Can create a custom view in order to change the dragged item view
    AViews.View.DragShadowBuilder shadowBuilder = new AViews.View.DragShadowBuilder(view);

    // Setting the original view cell to be invisible
    view.Visibility = ViewStates.Invisible;

    // NOTE: this method is introduced in Android 24, for earlier versions the StartDrag method should be used
    view.StartDragAndDrop(data, shadowBuilder, dragItem, 0);

    return true;
}
Now, when the user long taps an item on the list, it will create a drag shadow and hide the original element so it will give the dragging feeling to the user.
We now have to handle the drag events so we can update the data source accordingly. Drag events have various states which can be handled for different implementations. In our case, we will also need to be careful to handle the correct event state from the correct element (we are attaching the same handler to each cell as well as the list view itself).
For the initial implementation, we can just make use of the DragAction.Drop state, so when the user drops the drag shadow onto once of the list view cells, we can push the item that is being dragged into its position.
public bool OnDrag(AViews.View v, DragEvent e)
{
    switch (e.Action)
    {
        case DragAction.Started:
            break;
        case DragAction.Entered:
            System.Diagnostics.Debug.WriteLine($"DragAction.Entered from {v.GetType()}");
            break;
        case DragAction.Location:
            break;
        case DragAction.Exited:
            System.Diagnostics.Debug.WriteLine($"DragAction.Entered from {v.GetType()}");

            if (!(v is AWidget.ListView))
            {
                var positionEntered = GetListPositionForView(v);

                System.Diagnostics.Debug.WriteLine($"DragAction.Exited index {positionEntered}");
            }
            break;
        case DragAction.Drop:
            System.Diagnostics.Debug.WriteLine($"DragAction.Drop from {v.GetType()}");

            var mobileItem = (DragItem)e.LocalState;

            if (!(v is AWidget.ListView) && v != mobileItem.View)
            {
                mobileItem.Index = GetListPositionForView(v);

                mobileItem.View.Visibility = ViewStates.Visible;

                if (_element.ItemsSource is IOrderable orderable)
                {
                    orderable.ChangeOrdinal(mobileItem.OriginalIndex, mobileItem.Index);
                }
            }
            break;
        case DragAction.Ended:
            System.Diagnostics.Debug.WriteLine($"DragAction.Drop from {v.GetType()}");
            break;
    }

    return true;
}
What we are doing here is pretty straight forward:
- Retrieving the view position that fired drop event (notice we are only executing the code if the Drop event is coming from a type other than then the ListView or the original cell – LocalState.View)
- Assigning the new position to the drag state
- Finally invoking the change ordinal method in our IOrderable interface
In the code above, the method “GetListPositionForView” is a method that makes use of the ListView.GetPositionForView method.
private int GetListPositionForView(AViews.View view)
{
    return NormalizeListPosition(_listView.GetPositionForView(view));
}

private int NormalizeListPosition(int position)
{
    // We do not want to count the headers into the item source index
    return position - _listView.HeaderViewsCount;
}
While in theory, this should work enabling the drag’n’drop of items, if we run this implementation, you will notice that the list is never invalidated even though the source is updated. In order to force the redraw of the items, we can modify our IOrderable.ChangeOrdinal implementation to send a notification from the ObservableCollection back to the view. We did not need to do this for iOS since the drag operation on the UI was handled by the runtime (i.e. views were reordered once the user dragged the item across)
public void ChangeOrdinal(int oldIndex, int newIndex)
{
    var priorIndex = oldIndex;
    var latterIndex = newIndex;

    var changedItem = Items[oldIndex];
    if (newIndex < oldIndex)
    {
        // add one to where we delete, because we're increasing the index by inserting
        priorIndex += 1;
    }
    else
    {
        // add one to where we insert, because we haven't deleted the original yet
        latterIndex += 1;
    }

    Items.Insert(latterIndex, changedItem);
    Items.RemoveAt(priorIndex);

    OrderChanged?.Invoke(this, EventArgs.Empty);

    OnCollectionChanged(
        new NotifyCollectionChangedEventArgs(
            NotifyCollectionChangedAction.Move,
            changedItem,
            newIndex,
            oldIndex));
}
| NOTE: This should not be necessary, and the list adapter should be able to simply invoke NotifyDataSetChanged, however, this did not work out with this implementation. If anyone can get it to work or at least explain, please do let me know :). |

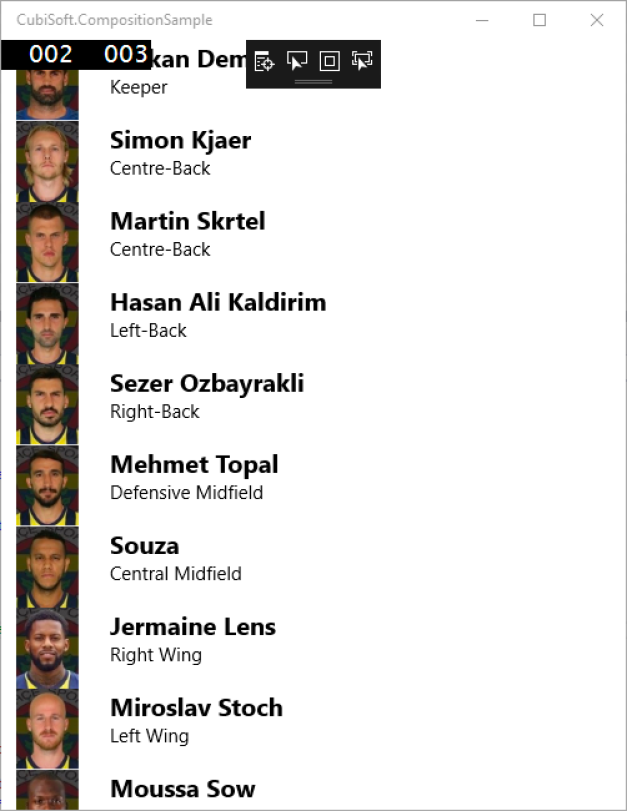
Android Drag’n’Drop without Animation
The outcome of this implementation is of course far from pleasant compared to how the iOS counter part looks like.
In order to make it a little more attractive to the eye, we can use a simple translation on the item that we are currently hovering over using the DragAction.Entered state.
So let us create a method to give the illusion that the item that is currently being dragged is inserted into a certain position in the list:
private int InsertOntoView(AViews.View view, DragItem item)
{
    var positionEntered = GetListPositionForView(view);
    var correctedPosition = positionEntered;

    // If the view already has a translation, we need to adjust the position
    // If the view has a positive translation, that means that the current position
    // is actually one index down then where it started.
    // If the view has a negative translation, that means it actually moved
    // up previous now we will need to move it down.
    if (view.TranslationY > 0)
    {
        correctedPosition += 1;
    }
    else if (view.TranslationY < 0)
    {
        correctedPosition -= 1;
    }

    // If the current index of the dragging item is bigger than the target
    // That means the dragging item is moving up, and the target view should
    // move down, and vice-versa
    var translationCoef = item.Index > correctedPosition ? 1 : -1;

    // We translate the item as much as the height of the drag item (up or down)
    view.TranslationY += translationCoef * item.View.Height;

    return correctedPosition;
}
Here we are deciding whether the target item should move up or down according to the current index of the drag item and the target view location. Also, according to any existing translation, we are determining whether the item had previously moved up or down so that can get the exact target position for the dragging item.
So now, we can execute this translation on the Entered action in our event handler and update the current index of the drag item.
public bool OnDrag(AViews.View v, DragEvent e)
{
    switch (e.Action)
    {
        case DragAction.Started:
            break;
        case DragAction.Entered:
            System.Diagnostics.Debug.WriteLine($"DragAction.Entered from {v.GetType()}");

            if(!(v is AWidget.ListView))
            {
                var dragItem = (DragItem)e.LocalState;

                var targetPosition = InsertOntoView(v, dragItem);

                dragItem.Index = targetPosition;

                // Keep a list of items that has translation so we can reset
                // them once the drag'n'drop is finished.
                _translatedItems.Add(v);
                _listView.Invalidate();
            }
            break;
        case DragAction.Location:
            break;
        case DragAction.Exited:
            System.Diagnostics.Debug.WriteLine($"DragAction.Entered from {v.GetType()}");
            break;
        case DragAction.Drop:
            System.Diagnostics.Debug.WriteLine($"DragAction.Drop from {v.GetType()}");
            break;
        case DragAction.Ended:
            System.Diagnostics.Debug.WriteLine($"DragAction.Ended from {v.GetType()}");

            if (!(v is AWidget.ListView))
            {
                return false;
            }

            var mobileItem = (DragItem)e.LocalState;

            mobileItem.View.Visibility = ViewStates.Visible;

            foreach (var view in _translatedItems)
            {
                view.TranslationY = 0;
            }

            _translatedItems.Clear();

            if (_element.ItemsSource is IOrderable orderable)
            {
                orderable.ChangeOrdinal(mobileItem.OriginalIndex, mobileItem.Index);
            }

            break;
    }

    return true;
}
Also, notice that now, we can move the changing of ordinal to the DragAction.Ended, since we are constantly updating the indexes while the user is dragging the item.
Another thing we are doing in the end state, is to reset the translations that we might have added during the drag and drop.
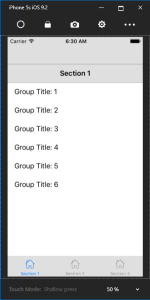
Android Drag’n’Drop with Translation
Ok, now it is a little better, since we are giving a feedback to the user continuously about the on-going drag’n’drop operation. However, the motion is still not as smooth as we want it to be. We can add a simple animation to resolve this. Modifying the InsertOntoView method:
private int InsertOntoView(AViews.View view, DragItem item)
{
    var positionEntered = GetListPositionForView(view);
    var correctedPosition = positionEntered;

    // If the view already has a translation, we need to adjust the position
    // If the view has a positive translation, that means that the current position
    // is actually one index down then where it started.
    // If the view has a negative translation, that means it actually moved
    // up previous now we will need to move it down.
    if (view.TranslationY > 0)
    {
        correctedPosition += 1;
    }
    else if (view.TranslationY < 0)
    {
        correctedPosition -= 1;
    }

    // If the current index of the dragging item is bigger than the target
    // That means the dragging item is moving up, and the target view should
    // move down, and vice-versa
    var translationCoef = item.Index > correctedPosition ? 1 : -1;

    // We translate the item as much as the height of the drag item (up or down)
    var translationTarget = view.TranslationY + (translationCoef * item.View.Height);

    ObjectAnimator anim = ObjectAnimator.OfFloat(view, "TranslationY", view.TranslationY, translationTarget);
    anim.SetDuration(100);
    anim.Start();

    return correctedPosition;
}
Now, the drag operation is much more pleasant and smooth.

Android Drag’n’Drop with Animation
Ok, I guess that’s it for this post, now we have both the iOS and Android parts for the sortable effect.
Happy coding everyone,